making_a_backup_of_your_pirlp_sd_card
This is an old revision of the document!
Using Windows to create a duplicate of your PiRLP SD Card…
Some of us have had issues with corrupted SD cards or maybe we made a mistake and trashed it inadvertently, either way you should always have a backup of your card. I have two handy at all times now.
Steps:
- Download a copy of “Win32 Disk Imager” from http://sourceforge.net/projects/win32diskimager/files/latest/download and unpack it. Keep note of where you unpacked it!
- Properly shut down your PiRLP Node entering this command as root: shutdown -h now
- Remove the SD Card from your Raspberry Pi PiRLP Node and insert it into your computer. Some computers may have an SD card slot other might require you to use an adapter, which ever the case be sure it is in there.
- Go to the folder you unpacked for the Win32 Disk Imager program and double click the Win32DiskImager.exe file and wait for it to come up. (Sometimes it takes a minute, be patient…)
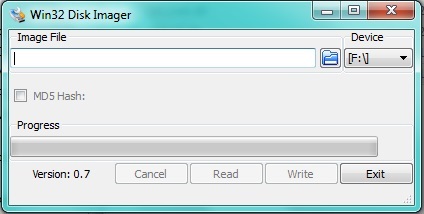
- In the text box presented you need to enter a name for your image file, in this tutorial we will use stn1234.img but you can make it anything you like.
- To the right of the text box is a heading that says “Device” and under that are going to drive letters be sure to select the drive letter of the device where you have your PiRLP SD Card located.
- Next you just hit Read and it will do its thing reading everything on the card and make an image on your computer of the SD Card.

making_a_backup_of_your_pirlp_sd_card.1364927412.txt.gz · Last modified: 2013/04/02 18:30 by k0kad